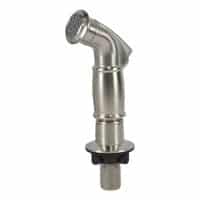
How to cap a kitchen sprayer. Sinks can be extremely aggravating to deal with. When a faucet begins to malfunction, you may notice the following symptoms.
Inability to turn the water on or off; constantly spraying when you want it off; and, finally, water dripping from spots where there should be none it has previously been set.
It’s also possible that water isn’t flowing out of the spout straight but is instead hitting the sink at an angle.
Contact a professional if this problem is painfully visible every time you use your sink and does not appear fixable by changing one element or the entire faucet.
How to cap a kitchen sprayer
We will discuss here the steps of cap a kitchen sprayer.
Step 1: Turn off the water supply
Remember to cut off the water supply valves beneath the sink when cleaning up kitchen spills to avoid needless overflow.
To be doubly certain, turn on your faucet and then push the trigger on your sprayer to empty any remaining water in the pipes.
Step 2: Trace The Sprayer Hose
Spray water on all the connections to observe which one has a leak to determine where the leak originates. This will assist you in selecting the root of the problem.
To repair it, use pliers to unscrew the connector and replace it with a new one. Make sure to reattach the sprayer hose correctly, twisting clockwise until it is securely fastened.
Step 3: Remove The Sprayer Hose
Remove the sprayer hose from your faucet. Remove any residue and wipe the threads on the inside of your faucet.
After removing any remaining residue, cover the lines with tape that matches the color of your faucet. Take a brass flare cap, twist it onto where the sprayer hose was, and reassemble everything!
Step 4: Loose Te Mounting Nut
After reaching beneath the sink and using either a basin wrench or your hand to loosen the sprayer support, use this chance to disinfect the area underneath and around it.
Then, reattach the support firmly with a new O-ring. Gently slide the tongue of the mounting nut off from behind and detach from the hose attached to the sprayer. Next, remove the faucet too.
Step 5: Insert a sink Hole Cover.
If the hole left by your sprayer looks like an empty well, take a cover for a spot about that size, such as one for a water-filling sink.
It could snap into place anywhere you need it to or use a mounting nut to secure it where you prefer.
FAQs
Is it possible to operate a faucet without a sprayer?
Although it may appear inconvenient, sprays last longer when used with a hose connected to the spout. Otherwise, you won’t get much usage out of your buy.
If a sprayer isn’t linked to another hose, the valve will remain closed, and you won’t be able to utilize much of it before it dries up.
How do you take a Quick Connect sprayer hose apart?
To de-compress the white quick connect adapter, push the top up, and hold it while doing so. Place your fingers on the black rubber part’s top while holding the white fast connect adapter up.
Pull down the black rubber part while releasing it with your fingertips on top of the white fast connect adapter.
Conclusion
We hope you enjoyed that blog about cap a kitchen sprayer. Please read this article if you have any questions or concerns about this topic. Thank you for reading; we are always excited when one of our posts can provide useful information on a subject like this!
Related Guides


